The sun is shining, the days are getting longer, and the unmistakable scent of a great Aussie summer is in the air. For many of us, that means one thing: it’s time to get the pool ready for action! After a long winter, your swimming pool needs a bit of TLC to transform it from a neglected pond into the sparkling, inviting oasis you’ve been dreaming of.
Setting up your pool for summer is more than just a quick skim of the leaves. It’s a systematic process that ensures your water is safe, clean, and ready for countless hours of splashing and relaxation. This guide will walk you through every essential step, from the first visual inspection to the final chemical balancing, all tailored for the unique challenges and conditions of the Australian climate.
Step 1: The Big Clean-Up – A Visual Inspection and Debris Removal
Before you even think about turning on the pump, it’s time to get your hands dirty (or, more accurately, wet!). Start with a thorough visual inspection of your entire pool area. Look for any damage that might have occurred over the cooler months. Check the pool liner for tears, the tiles for cracks, and the coping for loose sections. If you spot any minor issues, it’s best to address them now before they become bigger, more expensive problems.
Next, it’s time to tackle the debris. Use a long-handled scoop or a leaf rake to remove all the leaves, twigs, and other gunk that have settled on the surface and the bottom of the pool. Be patient; this can be a surprisingly big job, especially if your pool is surrounded by trees. Once the big stuff is out, you can use a pool cleaner to get rid of the finer sediment. This is a crucial first step, as a cleaner pool from the outset will make the rest of the process much easier.
Step 2: Checking Your Pool Equipment – Pumps, Filters, and Skimmers
Your pool is only as good as its equipment. Before you switch anything on, give your pump, filter, and skimmer baskets a good once-over.
The Pump: Check for any leaks or cracks. Make sure the pump basket is clean and free of debris. If your pump has been sitting idle, you might need to prime it with water to get it started.
The Filter: This is the heart of your pool’s cleaning system.
- Sand Filters: Backwash your sand filter to flush out all the accumulated dirt and debris. A good backwash will ensure your filter is working at its peak efficiency.
- Cartridge Filters: Remove the cartridge and give it a thorough clean with a garden hose. If it’s looking worn or has been used for a few seasons, it might be time for a replacement.
Skimmers: Empty the skimmer baskets. Make sure the weir door (the little flapper gate) is moving freely and isn’t blocked.
Step 3: Initial Water Level and Circulation
Now that your equipment is ready, it’s time to get the water flowing. Fill your pool to its proper operating level, which is usually about halfway up the skimmer opening. This ensures the skimmer can do its job effectively. Once the water level is correct, switch on your pump and filter system. Let it run for at least 24 hours to get the water circulating and the initial filtering process underway. This also helps distribute any chemicals you’ll add later.
Step 4: The All-Important Water Testing and Balancing
This is arguably the most critical step in setting up your pool for summer. Correctly balanced water is essential for swimmer safety, comfort, and the longevity of your pool equipment.
Test Your Water: Use a reliable pool test kit to measure the key parameters: pH, chlorine, total alkalinity (TA), and calcium hardness. You can purchase these kits from any pool supply store.
Understanding the Pool Numbers:
- pH: The ideal range is between 7.4 and 7.8. If your pH is too low (acidic), it can damage your pool surfaces and equipment. If it’s too high (alkaline), it can cause cloudy water and reduce the effectiveness of your chlorine.
- Chlorine: This is your primary sanitiser. For a clean, safe pool, you’ll need a free chlorine reading of 1-3 parts per million (ppm). You’ll likely need to “shock” the pool to get it to this level initially.
- Total Alkalinity (TA): This acts as a buffer for your pH. The ideal range is 80-120 ppm.
- Calcium Hardness: This protects your pool’s surfaces from corrosion. The recommended range is 200-400 ppm.
Step 5: Sanitising and Shocking Your Pool
After adjusting your TA and pH, it’s time to tackle the sanitisation. Start with a “shock” treatment. This involves adding a large dose of a fast-acting chlorine product to kill off all the bacteria, algae, and other organic matter that have built up over winter. Follow the instructions on the product packaging carefully, as the amount you need will depend on your pool’s size. It’s best to shock your pool at dusk or night to prevent the sun’s UV rays from breaking down the chlorine too quickly.
Step 6: Brushing and Vacuuming (Again!)
After the shock treatment has had a chance to work, it’s time for one final clean-up. Use a pool brush to scrub the walls, floor, and steps. This will dislodge any lingering algae or film. Then, give the pool one last thorough vacuum to pick up any debris that the brushing has loosened.
Step 7: Ongoing Maintenance
Congratulations! Your pool is now sparkling clean, chemically balanced, and ready for the season. But the job isn’t over. To keep your pool in tip-top shape all summer long, you’ll need to establish a regular maintenance routine. This includes:
- Daily: Check and empty skimmer baskets.
- Weekly: Test and balance your water chemistry (chlorine and pH are the most important).
- As needed: Skim the surface, vacuum the floor, and backwash your filter.
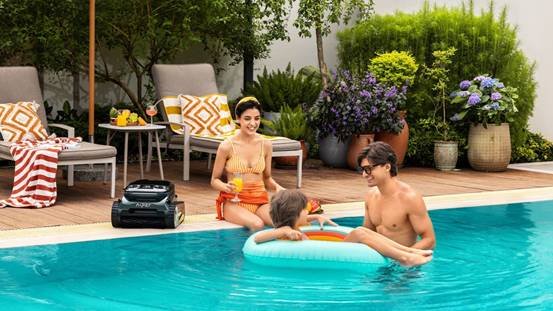
Following these steps will ensure your pool is not only a beautiful addition to your backyard but also a safe and healthy environment for you, your family, and your mates to enjoy. For a deeper clean, consider investing in the best pool cleaner to automate some of the work. Now, grab your towel, throw on your swimmers, and jump in—you’ve earned it!